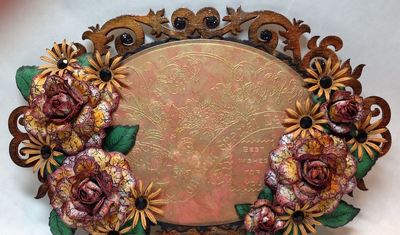
Special Day Rustic Frame

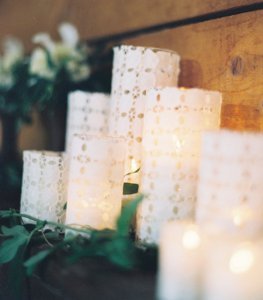
For a gift the bride and groom will never forget, make them a Special Day Rustic Frame. Not only will it fit the theme of their rustic wedding, but it's something they'll have around their house for years after the wedding ends. If you're planning the wedding, try making a few of these and filling them with pictures of the happy couple. They would look lovely as reception table centerpieces, or be the perfect details for around the guest book. The stunning intricacy of this frame is something the guests will never stop talking about.
Time to CompleteIn an evening
Primary TechniquePainting

Materials List
- Spellbinders Grand Decorative Ovals
- Papers: Cardstock (Light orange, black, green) and Ranger Glossy Paper
- Dies: Classic Leaf, Vintage Floret, Delicate Asters
- Clear embossing powder and clear glaze
- Tools: Heat gun, Felt pad and tool, Copic marker YR 27, Essential Glue pad, Paper Blossoms Tool Kit, die cutting machine, Paper Blossoms Molding Mat
- Inks: Ranger Alcohol inks (Caramel, Mountain Rose, Gold and Latte), Ranger Distress inks (Vintage Photo, Brushed Corduroy, Fired Brick, Black Soot), Memento ink (Tuxedo Black)
- Adornments: Black rhinestones, Double Dots 100pc. -3D Foam Squares, Ovals Grand Nestabilities
- Stamp Sets: Home Is Where the Heart Is Cling, Open Leaf Cling, Mini Vintage Floret Cling, Open Vintage Floret Cling, Delicate Asters Cling
- Unpainted frame
Instructions
-
Take the frame and cover it with brushed Corduroy and Vintage Photo inks.
-
Take Black Soot ink and sponge the outer edges randomly.
-
Spray the frame with clear glaze.
-
Repeat 4 times.
-
Take the third Decorative Grand Oval and cut/emboss it with black cardstock.
-
Stamp the Home is Where the Heart is stamp set and stamp it on the glossy paper with the Essential Glue pad.
-
Pour clear embossing powder over it and heat set.
-
Cut/emboss it with the fourth Grand Oval.
-
Squirt some of the Alcohol inks onto the felt pad and pounce it all over the oval.
-
Stamp the following flowers in black ink and cut them with the matching die: five of the classic leaf on green CS, fifteen of the small Mini Florets onto paper from the Romantique collection, two of the florets in green CS (for rose buds), six of the second and third Vintage Florets in the Romantique collection, and nine of the small Delicate Asters in light orange CS.
-
Sponge Fired Brick ink to the Floret flower pedals and some of the YR-27.
-
Sponge the leaves with black ink.
-
Watch below video for shaping the flowers.
-
Add the rhinestones to the flowers and frame.
-
Add all of the elements to the frame as shown in the photo.