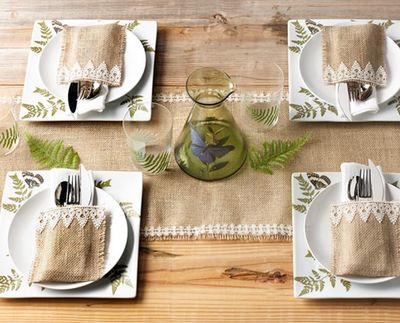
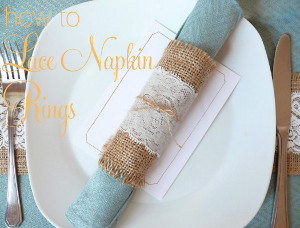
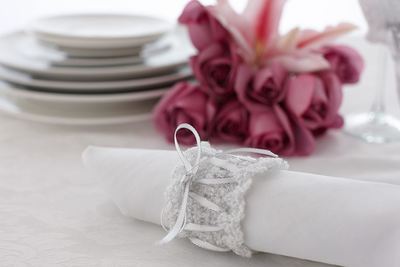
Lace and Burlap Table Setting
 It turns out there are table decor ideas out there that are both useful and completely doable for the stressed bride-to-be. This Lace and Burlap Table Setting is simple to put together for your reception tables and will look lovely in your rustic wedding. These simple DIY craft ideas will really pull your tables together and give your wedding some much-needed country charm. Keep a set for yourself and use it on special occasions at home with your new husband after the wedding is over.
Time to Complete: In an evening

Estimated Cost: $31+
Materials:
- Martha Stewart Crafts® Decoupage Multi-Surface Finish - Durable Gloss, 8oz
- Martha Stewart Crafts® Decoupage Fabric-to-Fabric Finish - Matte, 8oz
- Martha Stewart Crafts® Decoupage Paper Cut-outs - Butterflies and Ferns
- Martha Stewart Crafts® Decoupage Lace Trims - Geometric Ivory
- Martha Stewart Crafts® Decoupage Brush Set
- 1.5 yards burlap fabric
- Desired surfaces for table setting
- Plates
- Glasses
- Wax paper
Instructions
Burlap pockets:
- Cut 2 Burlap pieces 5 x 12”.
- Fold in half and press to create fold.
- Using the Multi-Surface Fabric-to-Fabric Durable Matte Finish, apply along the two edges of the burlap and press together to create a pocket. Let dry.
- Using Fabric-to-Fabric Matte Finish, apply lace trim to top of pocket as shown, place wax paper inside top of pocket, so the pocket does not dry closed.
- Cut a long section of burlap to desired size to create table runner. Working on wax paper, use the Fabric-to-Fabric Matte Finish to add lace trim to edges as shown. Let dry.
Glassware:
- Tape off the top of glasses and carafe about 1in from the top.
- Apply paper cut out designs as shown using the Multi-Surface Durable Gloss Finish. Let dry.
- Apply second coat covering entire surface to seal.
- Apply fern and butterfly designs to square charger plate as shown.
- Using the Multi-Surface Gloss Finish, apply a second coat to entire plate to seal. Let dry.
Read NextStunning Baby's Breath Centerpieces