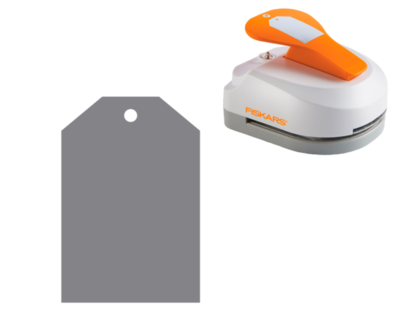
Fiskars Simple Tag Maker
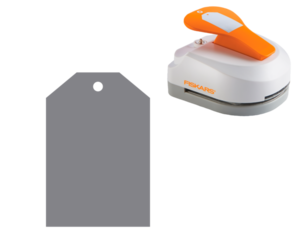 Simple Tag Maker
Gifted by Fiskars
www.fiskars.com
Reviewed by Jeanette Benoit, Editor, AllFreeDIYWeddings.com
The Simple Tag Maker is definitely one of my new favorite craft supplies. This handy little machine is incredibly easy to use and quickly creates the cutest little tags (2" by 3") that can be used for a variety of different things including party favors, scrapbooking, card making, and more. You could even string a bunch of them together to create homemade wedding decor such as a banner that says "Just Married" or "Mr. & Mrs." It also features a built-in Eyelet Setter which makes it super easy to create a ready-to-use hang tag in just three quick steps. Plus, the Tag Maker comes with 20 free eyelets to get you started, which is super convenient.
The machine is fairly lightweight considering it is made with metal. The punch itself is pretty sturdy and can punch heavy materials (up to 80-lb cardstock) with nice, clean cuts. You won't have to worry about paper getting stuck in the punch and ripping your paper, at least not at first. Who knows how it will hold up after heavy use, but Fiskars is known for their high-quality blades, so I don't expect any serious wear and tear. Plus, it comes with a Lifetime Warranty.
Not only is the Tag Maker lightweight, but it's also small, quiet, and easy to use, too. In just three simple steps, you will have a nice, clean tag. All you do is insert your paper of choice into the large slot and push the lever down to punch the actual tag. Then, insert your tag into the smaller slot and push the lever down again to punch the hole (which will be perfectly centered, by the way). Lastly, place the paper on the peg on the back of the punch (you will actually slip the hole over the peg and then place the eyelet on top of the paper) and push down the lever one final time; voila- your tag is complete, eyelet and all!
The process of attaching the eyelet was actually kind of confusing for the novice tag maker such as myself. At first, I wasn't sure which way to place the eyelet. Flat side up or down? Eyelet underneath or on top of the paper? Because the Tag Maker is theoretically very easy to use, it does not come with any instructions, so it took me a few times to get it right. I finally figured it out through a bit of trial and error and I was so happy with how cute my tag looked, I didn't even mind sacrificing one eyelet. Luckily, I have plenty more to use!
Read NextFloraCraft Make It: Fun Foam