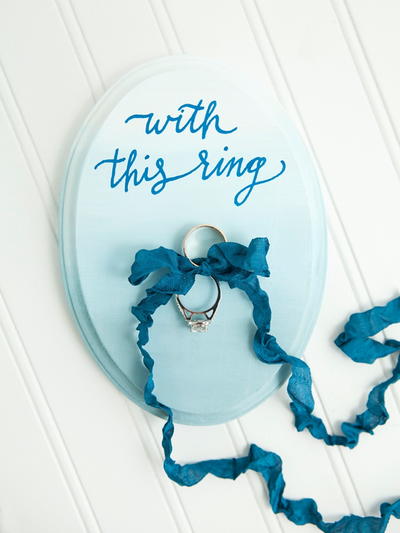
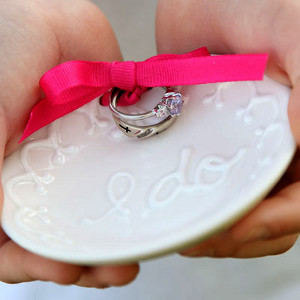
Stunning and Simple I Do Ring Dish

Let your rings come down the aisle almost as glamorously as you do in the Stunning and Simple I Do Ring Dish. This pretty ring dish is easy to make, but it will be one of your favorite aspects of your big day. Keep the memory on display by using it in your home once the big day is over. Match the ribbon to your wedding colors for a truly customized feel. If you want to make the dish even more personal, use the same technique to write your fiance and your new monogram instead of I do. It's fun to come up with ring bearer ideas that others haven't done to make your day unique, and this creative homemade dish does just that.
Time to complete: Weekend project

Estimated Cost: $21-$30
Time to complete: Weekend project
Estimated Cost: $21-$30
Read more at http://www.allfreediyweddings.com/Bridal-Attire/My-Little-Secret-Sparkling-Heels-from-I-Love-to-Create#Is6I11YhU17iDP8o.99Time to complete: Weekend project
Estimated Cost: $21-$30
Read more at http://www.allfreediyweddings.com/Bridal-Attire/My-Little-Secret-Sparkling-Heels-from-I-Love-to-Create#Is6I11YhU17iDP8o.99
Materials:
- New Bisque Designs -Ring Bowl 4” x 4” x .75” (31234)
- Thin 'n Shade™
- Signature Brushes -SB 807 No. 6 Fan Glaze
- Duncan® French Dimensions™ -FD 258 Pure White
- Duncan® Pure Brilliance® Clear Glaze
- Container for water
- Potter’s sponge
- Paper towel
- Tracing paper, one sheet 8½” x 11”
- Pencil
- Pattern
Instructions:
1. Wipe ware with damp sponge to remove bisque dust.
2. Use pencil, pattern and tracing paper to transfer pattern to dish.
3. Squeeze out French Dimensions Pure White on paper towel to test fluidity.
4. Use Pure White to trace over the “I do” in the center of the dish. Next add scalloped border design. Let dry well.
5. Carefully dab a coat of Pure Brilliance over the raised design on plate with brush. Let dry and then add a second coat. Repeat on the back of dish. Let dry.
6. Stilt in kiln and fire to cone 06.
Your Recently Viewed Projects
Thanks for your comment. Don't forget to share!
mulberrygalprinces s
Jan 09, 2018
I saw this and thought what a pretty and different idea for the ring . Usually it's a pillow. So I started reading thru the directions and was doing okay until I got to the part about using the kiln. Not many people have kilns. Infact, I don't know anyone who does.
Report Inappropriate Comment
Are you sure you would like to report this comment? It will be flagged for our moderators to take action.
Thank you for taking the time to improve the content on our site.