Delicate Lace Crochet Bag Pattern
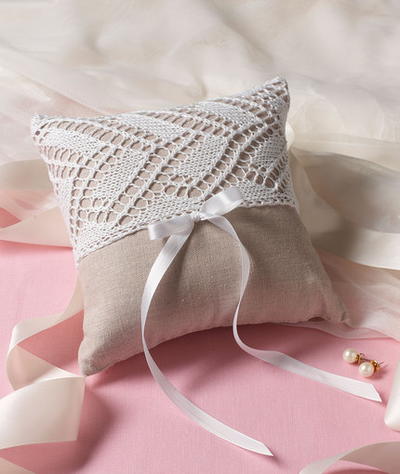
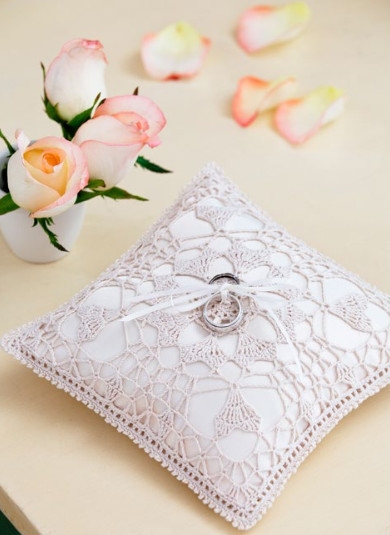
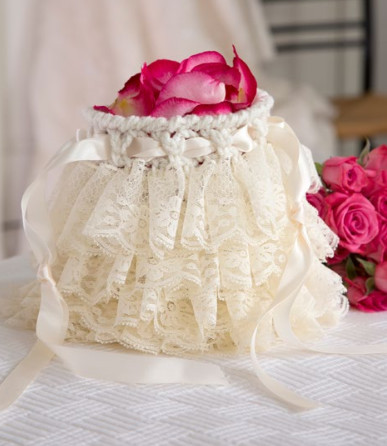
 Whether a bridesmaid or bride, every wedding participant had essential items to carry around on the big day. Don't spoil your gorgeous ensemble with a fashion faux-pas. Instead, make sure your bag is as stunning as the rest of your look with the Delicate Lace Crochet Bag Pattern. This adorable crochet purse is small enough that it's not intrusive but big enough to hold the necessities. The sweet bag also has a ultra-convenient drawstring to ensure that your items are secure. If you've already chosen your purse for the wedding, this precious purse also serves as a perfect pouch for the flower girl. Put her petals inside, drawstring it shut to avoid premature petal scattering, and then watch the romance unfold as she makes her way down the aisle with this beautiful crochet bag.
Time to Complete: In an Evening
Primary Technique: Crochet

Estimated Cost: $11-$20
Materials:
- RED HEART® With Love®: 1 skein 1101 Eggshell A
- RED HEART® Boutique Sassy Lace™: 1 hank 9001 Vanilla B
- Susan Bates® Crochet Hook: 6mm [J-10 US]
- Yarn needle
- 30” (76 cm) length of satin ribbon, 5/8” (16mm) wide
- 5mm [H-8 US] (for optional chain drawstrings)
Instructions:
GAUGE: Rounds 1–6 = 4” (10 cm) in single crochet with larger hook; 14 rows = 4” (10 cm) in mesh pattern. CHECK YOUR GAUGE. Use any size hook to obtain the gauge.
ABBREVIATIONS
A, B, C=Color A, Color B, Color C, etc.
ch=chain
sc=single crochet
sp(s)=space(s)
st(s)=stitch(es)
( )=work directions in parentheses into same st
[ ]=work directions in brackets the number of times specified
*=repeat whatever follows the * as indicated
Bag measures 8” wide x 7” high (20.5 x 18 cm), including ruffles and with open top.
Special Stitches
reverse sc (reverse single crochet) = Work single crochet in opposite direction from which you would usually work (left to right if you are right-handed and right to left if you are left-handed). This stitch is also known as crab stitch. It creates a rope-like twisted single crochet edging.
rfsc (ruffle single crochet) = With holes at top, hold B together with A, insert hook in indicated space and thru next hole of B from front to back, insert thru next hole of B from front to back, yo with A, draw up a loop (through both holes of B and current st) (2 loops on hook), yo, pull thru both loops.
Notes
1. Bag is worked from bottom up in 6 joined rounds with right side facing, then remainder of piece is worked in turned rounds. Drawstrings are woven through eyelet row.
2. Lace yarn has holes running along one side. Holding both yarns together, work into each hole of lace yarn to create fullest ruffles.
3. To join B, hold yarn to inside of bag, working around B, slip stitch to join round. Carry B up side of bag until next needed.
4. If you prefer, drawstrings can be made with smaller hook and A instead of satin ribbon.
 BAG
BAG
With A, ch 2.
Round 1 (right side): Work 6 sc in 2nd ch from hook; join with slip st in first sc—6 sc.
Round 2: Ch 1, 2 sc in each st; join with slip st in first sc—12 sc.
Round 3: Ch 1, [sc in next st, 2 sc in next st] 6 times; join with slip st in first sc—18 sc.
Round 4: Ch 1, [sc in next 2 sts, 2 sc in next st] 6 times; join with slip st in first sc—24 sc.
Round 5: Ch 1, [sc in next 3 sts, 2 sc in next st] 6 times; join with slip st in first sc—30 sc.
Round 6: Ch 1, [sc in next 4 sts, 2 sc in next st] 6 times; join with slip st in first sc, turn—36 sc.
Round 7: Ch 1, sc in first st, *[ch 2, skip next st, sc in next st] 4 times, ch 2, sc in next st; repeat from * twice, [ch 2, skip next st, sc in next st] 4 times, ch 2; join with slip st in first sc, turn—20 sc and 20 ch-2 spaces.
Round 8: Ch 1, sc in first ch-2 space, [ch 2, skip next sc, sc in next ch-2 space] 19 times, ch 2; join with slip st in first sc, turn.
Round 9 (right side): Ch 1, sc in first ch-2 space, [ch 2, skip next sc, sc in next ch-2 space] 19 times, ch 2, holding B to right side of piece with first hole at first sc; join with slip st in first sc, turn.
Note: Be sure to work Round 10 with B on right (inner) side of piece.
Round 10: Ch 1, rfsc in first ch-2 space, [ch 2, skip next sc, rfsc in next ch-2 space] 19 times; join with slip st to first rfsc, turn—20 rfsc and 20 ch-2 spaces.
Rounds 11–13: Repeat Round 8 three times.
Round 14: Repeat Round 10.
Rounds 15–22: Repeat Rounds 11–14 twice.
Rounds 23–25: Repeat Round 8 three times.
Round 26: Ch 1, rfsc in first ch-2 space, [ch 2, skip next sc, rfsc in next ch-2 space] 19 times; leaving a 3” (7.5 cm) tail, cut B, fold tail back so that next 2 holes are aligned together; working though last 2 holes, join with slip st to first rfsc, turn—20 rfsc and 20 ch-2 spaces.
Round 27 (eyelet row): Ch 1, sc in first ch-2 space, [ch 4, skip next sc, sc in next ch-2 space] 19 times, ch 4; join with slip st in first sc, turn—20 sc and 20 ch-4 spaces.
Round 28: Ch 1, sc in next ch-4 space, [ch 1, skip next sc, sc in next ch-4 space] 19 times, ch 1; join with slip st in first sc—20 sc and 20 ch-1 spaces.
Round 29: Ch 1, reverse sc in each sc and ch-1 space around; join with slip st in first sc—40 sc.
FINISHING
Tie a tight knot in the ends of B close to the inside of bag and trim excess yarn. Either ribbon or yarn chain drawstrings can be made.
Ribbon Drawstrings: Cut satin ribbon into two 15” (38 cm) lengths. Weave each ribbon through 20 consecutive spaces of eyelet row and adjust so tails hang evenly at each end. Knot 2 tails tightly at each side and trim ribbon to desired length.
Yarn Chain Drawstrings (make 2): With smaller hook and A, ch 64. Fasten off. Weave each drawstring chain through 20 consecutive spaces of eyelet row and adjust so tails hang evenly at each end. Knot 2 tails tightly at each side. Weave in ends.
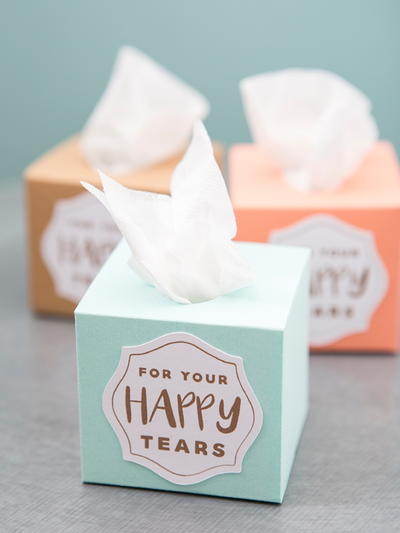
Read NextHappy Tears Mini Tissue Boxes
Your Recently Viewed Projects
Thanks for your comment. Don't forget to share!
Zeemer
Aug 22, 2016
Lovely! I want to make this in the next important wedding. What's so exciting about this is it is a crochet project. It's like your putting fish in the water. Thanks for the free pattern that is made available right on the same page.
Report Inappropriate Comment
Are you sure you would like to report this comment? It will be flagged for our moderators to take action.
Thank you for taking the time to improve the content on our site.